Michael Caine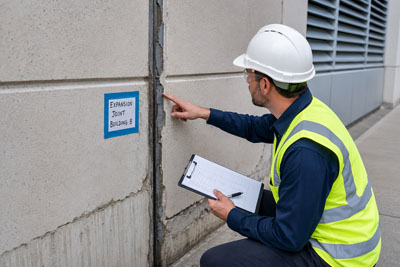
Exterior joints are exposed to rain, sunlight, temperature swings, dirt, and repeated movement. Once sealant loses adhesion or cracks apart, water can reach gaps around trim, penetrations, siding transitions, and other vulnerable connections.
Regular inspection gives you the best chance to repair failing exterior sealant before moisture reaches hidden materials behind the finished surface.
Inspect Joints From More Than One Angle
A sealant bead can look intact from a distance while one edge has already separated. Check both sides of the joint and look for splits, shrinking, gaps, hardened surfaces, or sections pulling away.
People following exterior property care should pay extra attention after severe weather and seasonal temperature changes. Movement between different building materials can gradually stress even a well-installed joint.
Look for Water Clues Nearby
Peeling paint, staining, swelling trim, or dampness near a joint can indicate that the visible seal deserves closer attention. These signs don’t prove the sealant is the only cause, but they shouldn’t be ignored.
Prepare the Joint Before Applying New Sealant
New material bonds best to a suitable, clean, stable surface. Loose sealant, dirt, chalky residue, and trapped moisture can interfere with adhesion.
General home repair information may make resealing appear simple, but preparation usually determines whether the repair lasts. Follow manufacturer directions for removing failed material, cleaning the substrate, and preparing the joint.
| Joint Condition | What It Suggests | Response |
|---|---|---|
| Firm and flexible | Seal still functioning | Monitor |
| Edge separation | Adhesion loss | Prepare and reseal |
| Deep cracking | Aging or movement | Replace failed material |
| Repeated failure | Joint or substrate issue | Investigate cause |
Match the Sealant to the Location
Exterior sealants differ in adhesion, flexibility, paintability, curing requirements, and compatibility with building materials. A product intended for one surface or environment may perform poorly in another.
Homeowners reviewing exterior design and upkeep should treat product selection as a technical decision, not simply a color match. Read the label for approved substrates, exposure conditions, joint dimensions, and application temperature.
Respect Weather and Curing Conditions
Rain, cold, extreme heat, or damp surfaces can affect application and curing. Planning the repair around suitable weather can be as important as choosing the correct product.
Protect freshly applied material according to its instructions until it has cured enough to handle exposure.
Where Exterior Sealing Repairs Fail
One common mistake is applying a thin cosmetic layer over a joint that has already separated. The new surface may look better while the weak material underneath continues to move.
Another problem is sealing locations that were designed to drain or ventilate. Not every opening on an exterior wall should be filled. Weep paths, drainage details, and manufacturer-designed gaps may be necessary for the building system to function.
When the purpose of an opening is unclear, identify the assembly before sealing it.
Frequently Asked Questions
How often should exterior sealant be inspected?
A visual check at least seasonally is useful for exposed joints, with additional inspection after storms, exterior repairs, or noticeable changes around windows, doors, siding, and trim.
Can new sealant be applied over old sealant?
Sometimes small maintenance applications are permitted, but badly detached, contaminated, or deteriorated material generally provides a poor base. Follow the new product’s preparation instructions.
Why does exterior sealant keep cracking?
Repeated cracking can result from joint movement, unsuitable product choice, poor adhesion, improper joint design, contaminated surfaces, or application under unsuitable conditions. Recurring failure deserves more than another surface patch.
Stop Water at the Joint
Exterior sealant works best when it remains bonded to both sides of the joint and flexible enough to handle normal movement. Inspect exposed connections before deterioration becomes severe, and prepare failed joints properly before resealing them.
If the same area repeatedly opens or shows signs of moisture damage, investigate the underlying joint rather than continuing to cover the symptom.